Folks seem very intimidated, by the thought of removing and re-installing their valve body. I built this page to help.
If you need to purchase a valve body for you Vw review the following link and use the contact button to email us.
http://kansascitytdi.com/01m-valve-body-repair/
First remove the skid plate pan and filter as shown in 01M filter change.
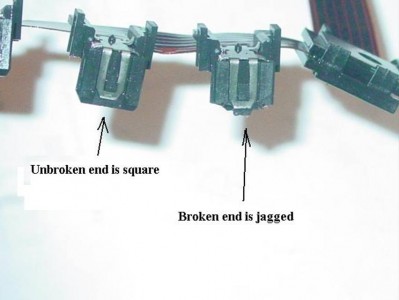
The most difficult part is unplugging the solenoid harness without breaking the ends off. If your ends break off you could end up with a solenoid code immediately or your connector could wiggle loose over time and give you a solenoid code later. Here’s what the broken connectors look like.


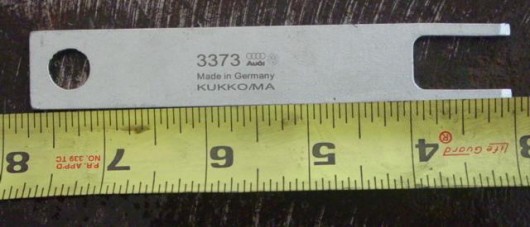
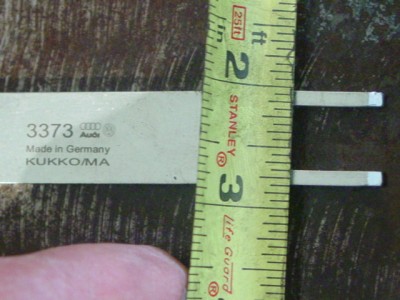
Vw makes a special tool for this. Here’s a pic of the special tool. I put a tape measure with it so you could make one if you wanted. I have a aluminum version available for $14 (includes shipping in continental usa). click here to purchase tool–> 01m shopping page
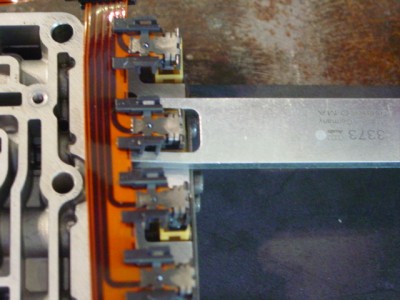
So if you’re pulling your valve body or changing a solenoid then carefully pry the solenoid with the special tool as in the pic. Using a twisting motion helps with the special tool.
click here to purchase tool–> 01m shopping page
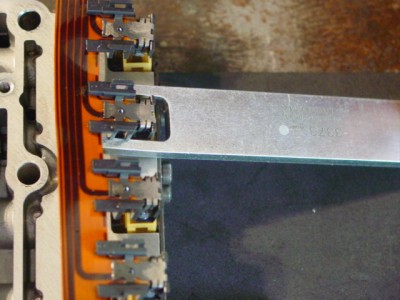
Notice how this cocks the connector in the solenoid. This is what you want to a certain extent because it make the teeth move to the left to disengage the window that they lock in. Be careful though wiggle gently. And watch as your doing it.
Using a twisting motion with the special tool really helps. What your after is unlocking one “tooth” at a time.
Here’s what happens if you get too aggressive trying to release teeth with a pick. This solenoid is ok and reusable but if your break that piece out then you’ll need to replace the solenoid to keep the connector plugged in to it.
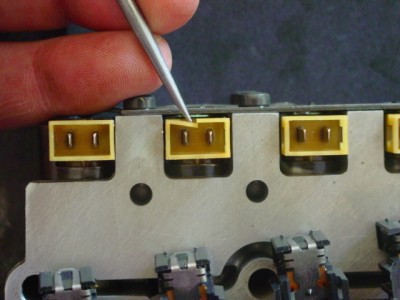
Here’s an alternate method you might try with a screwdriver if you don’t have the special tool. It makes the same motion and I had good luck doing it this way back when. Notice it cocks the connector the same way to pull the teeth out of the “window” that they latch into. Prying gently up and then down with the screwdriver “mimics” the twisting motion that you would do with the special tool.
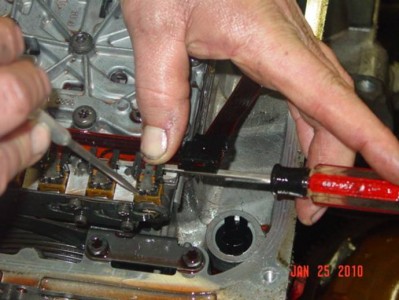
Now loosen the bolt that holds the manual valve linkage. Do take it out of the threads, but do not take the bolt all the way out of the linkage. If it falls apart it can be a little confusing on how it goes back together.

Just leave it like it is in the pic. The manual valve will probably pull out with the link. If so just set it aside till your ready to reinstall the manual valve linkage.
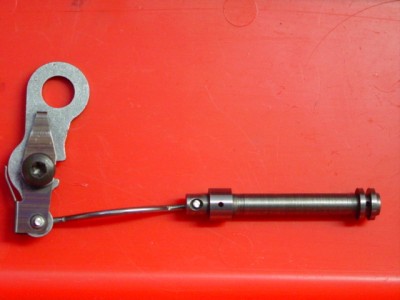
This is the manual valve hooked to the link. There is no clip or keeper to hold the link to the manual valve. The manual valve might stay inside the VB. If so you can pull it out with a small magnet.
At this point pull the torx bolts out of the valve body. There are two little T20’s and a bunch of large T30’s. Just pull the T30’s out. Don’t pull out the T20’s. The T20’s hold the valve body together and if you separate them you might loose checkballs and springs. Some fluid will run out when you remove the valve body.
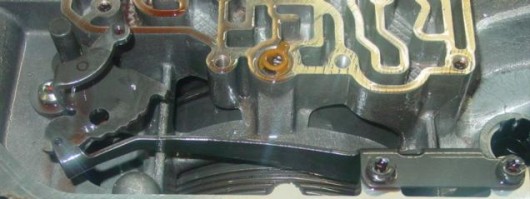
Up above the valve body there is a reverse feed pipe. I’ve never had one fall out on me but it is possible. If it does fall out put it back. Here is where it goes.
Be sure to use a quality torque wrench to tighten the valve body bolts as you reassemble. Torque to 44 inch lbs. Even slightly overt tightening can make the valves stick.
Watch the following video.

